Nextcloud
Nextcloud
This following Nextcloud documentation includes some tweaks we need to make in order to properly install Nextcloud with the BBB plugin integration.
Install
We assume here that you already have both Nextcloud and BigBlueButton installed. If that is not the case, see section Set up your own Nextcloud for more information.
BBB plugin
With Nextcloud up and running, let's install and configure the BigBlueButton plugin:
- Follow through with Klaus' repository guidance;
- Proceed with "To install it change into your Nextcloud's apps directory";
- If some errors appear, upgrade node's version to
14.21.2, and runmake buildagain; - Then go to your profile in the Nexcloud server >
Apps>BigBlueButton Integration>Enable; - Once it is enabled, configure the API URL and the salt of your bbb server inside
Nextcloud by going to
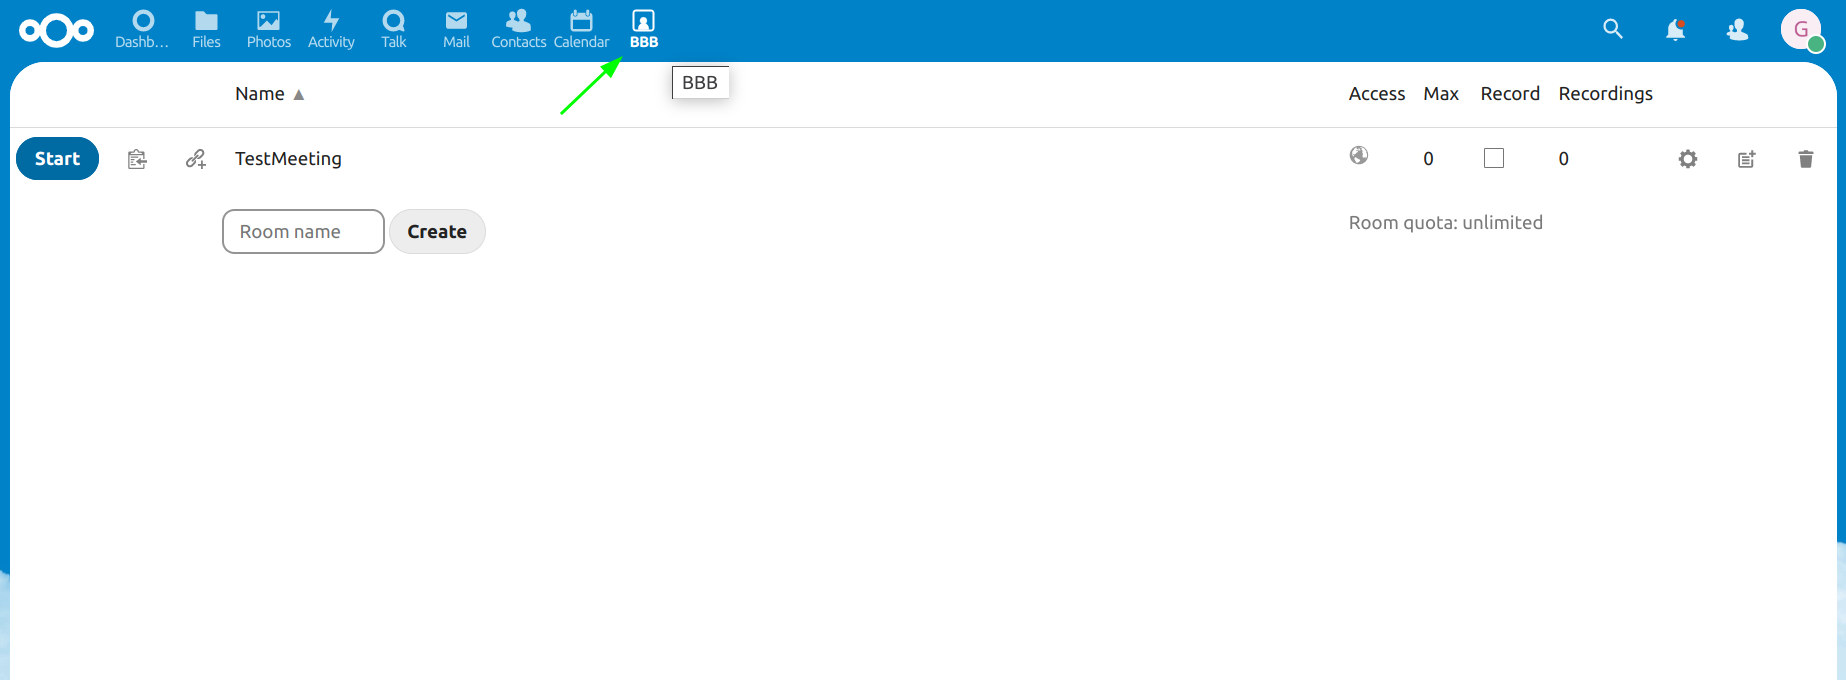
profile>Additional settings; - And finally you can you can access the BBB integration in the top bar of the UI, see picture below:
Integration
Now let's see some basic features of this integration:
Manage rooms
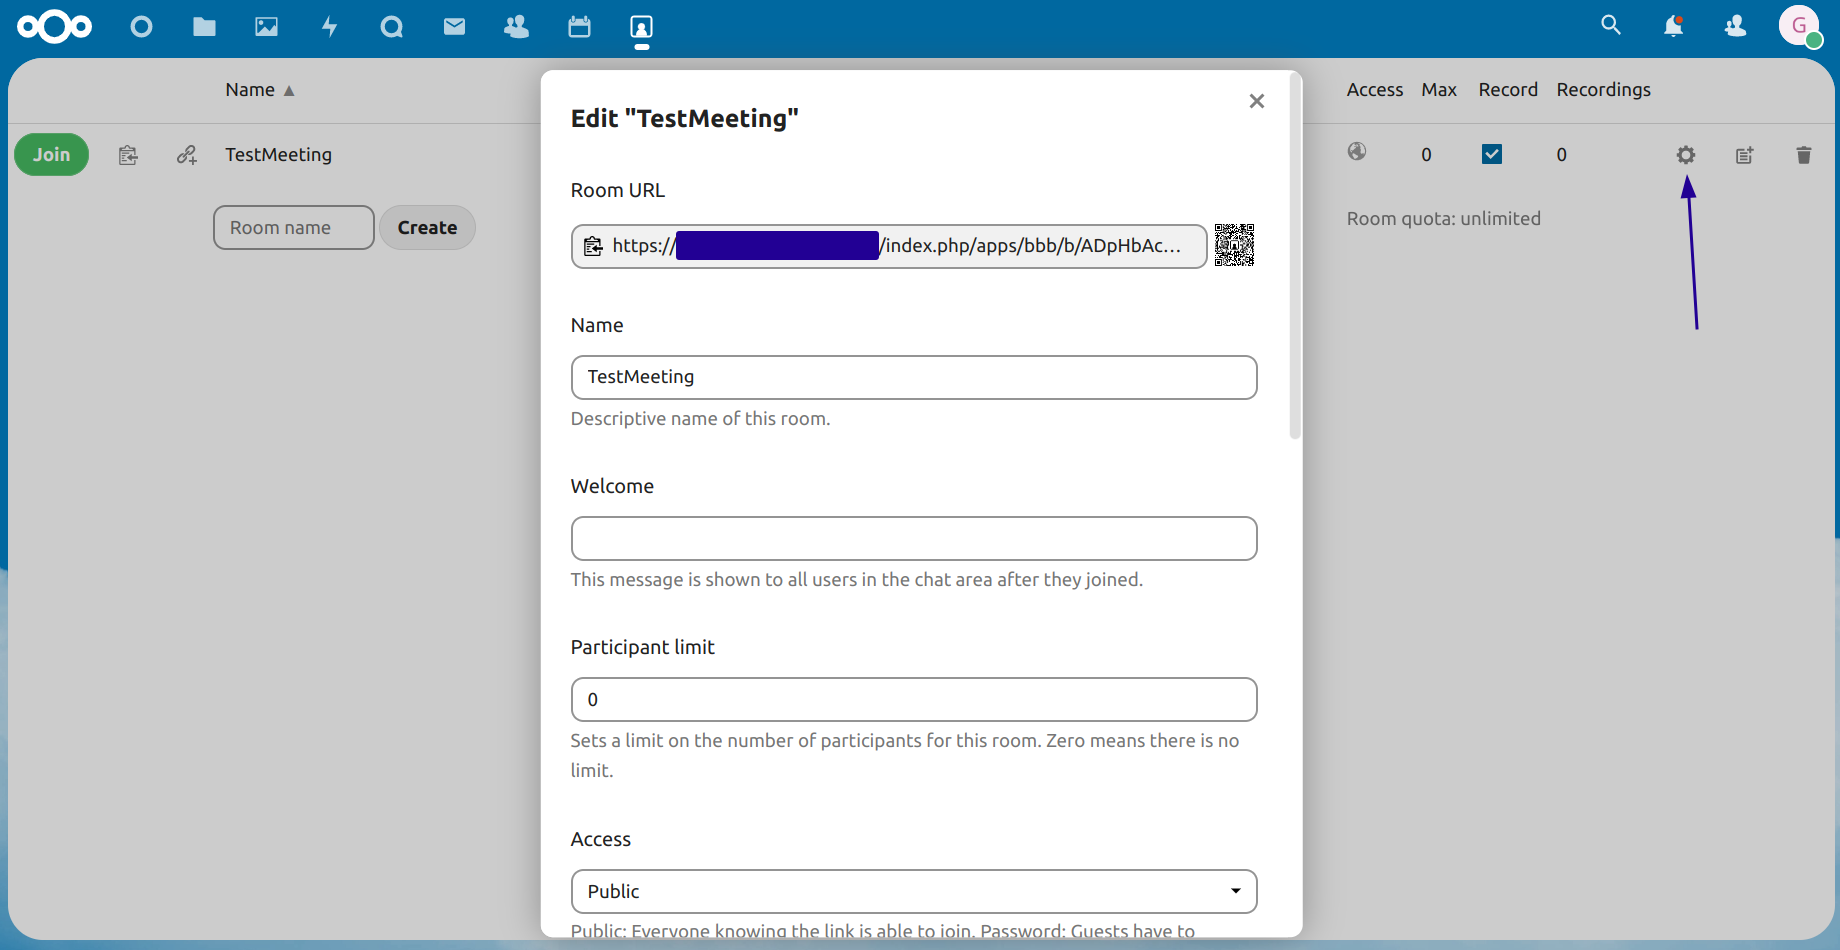
You will first encounter the UI with nothing but a placeholder to insert a new Room name and a the create button. You can create a new Room and it will appear as an item in the list, by then, you can start and enter the meeting.
It is possible to set the room as recordable, set the welcome message and many more configurations that can be chosen by clicking the gear button:
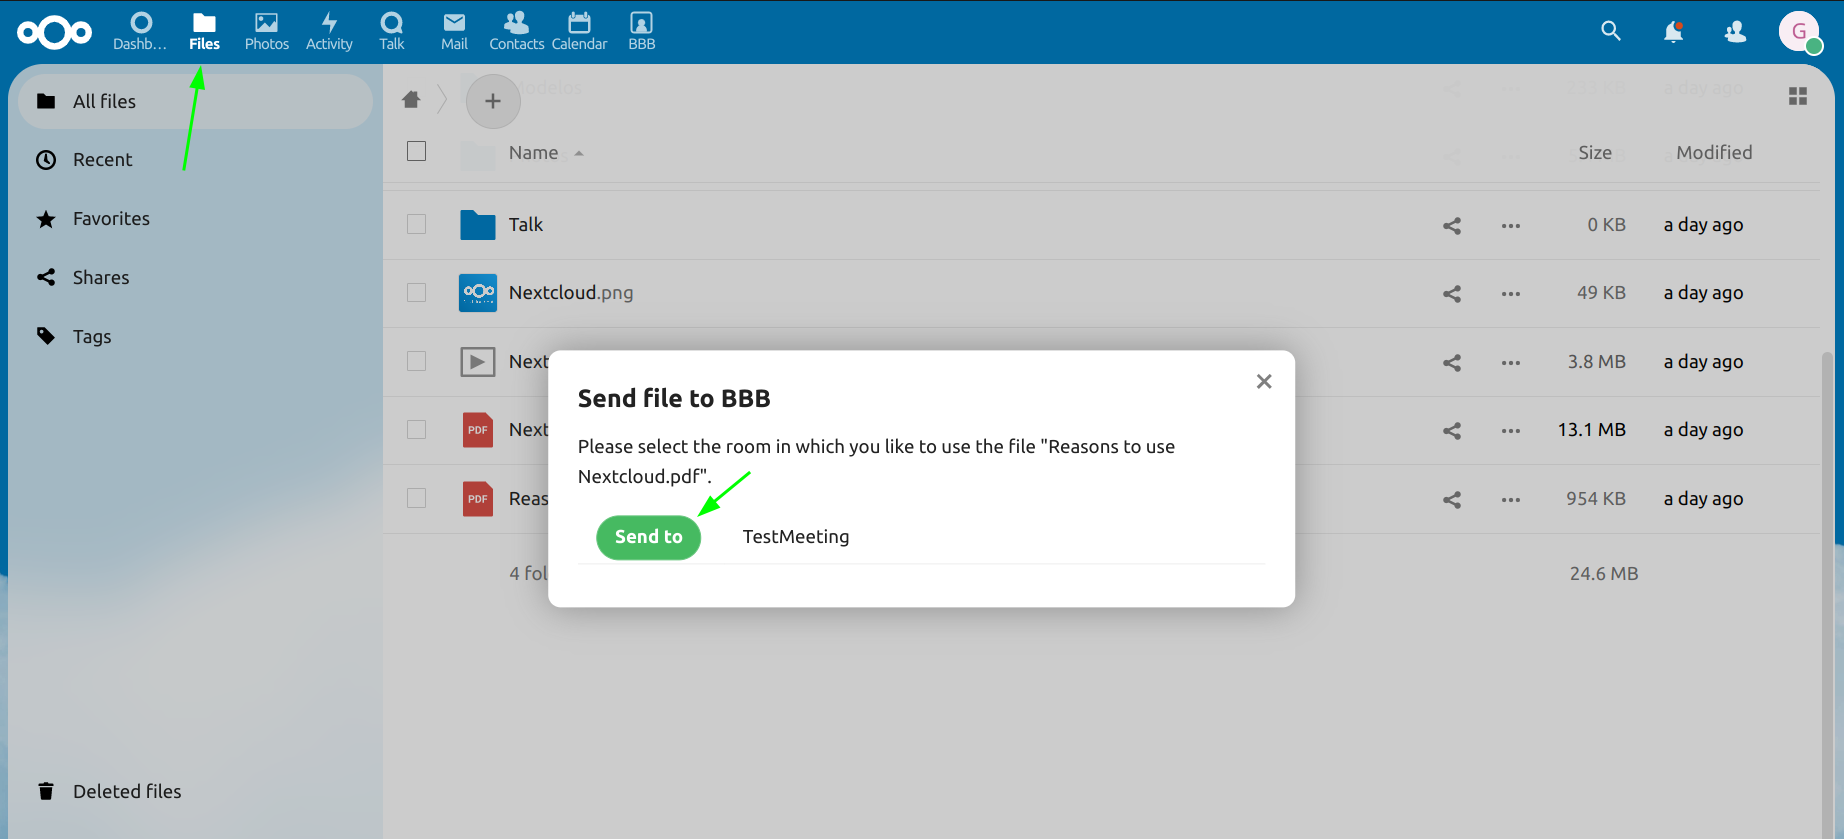
Send file to BBB
After entering the room, it is possible to send documents to the ongoing call, you just need
to go to your files menu, click the three dots, scroll down a bit and click "Send to BBB"
Optional Set up your own Nextcloud
Check the official documentation for up to date instructions. As for the time we are writing this, these were the steps followed that worked quite well.
Firstly, assuming that you already have bigbluebutton up and running (if that's not the case, you can do so following instructions here), you will need a server with the minimum requirements defined here for Nextcloud.
As the process of installing Nextcloud can change along the way, we are going to try as much as possible to just follow through with the official instructions on how to install and configure the Nextcloud server.
Step-by-step to install Nextcloud
- Follow the steps on the official documentation
- When you get to the part
"Now download the archive of the latest Nextcloud version", it changed a little:- Scroll down the page;
- In the section "DOWNLOAD SERVER" click on "COMMUNITY PROJECTS"
- Scroll down a little more;
- Now, in the section "archive", under the
"Get ZIP file"button you'll find the.tar.bz2files to upload it to your server;
- It seems that they changed the way the files are named, so just replace
nextcloud.x.y.zforlatestin all the steps; - In
"Next steps", go to their official apache configuration page; - Go on with the installation and configuration of the apache server according to them;
Reminder: if you are installing Nextcloud in virtual machine of any kind - a dropplet,
for instance - follow through with "To use the virtual host installation";
Now, if everything went well you will have a SSL problem that can easily be solved by the following.
SSL configuration
This might be a tricky part, and you can surely use another SSL certificate, but here I am going
to cover let's encrypt, as suggested by them.
- Follow these commands
- Now go to digital ocean tutorial
on how to configure the let's encrypt certificate in an
apache serverand follow through (there is no need to create/etc/apache2/sites-available/your_domain.confbecause/etc/apache2/sites-available/nextcloud.confalready handles it); - After you are done, it may still not be working, set the following configurations into
the following files:
- In
000-default.conf, setServerName your_domain; - In
default-ssl.conf, setServerName localhost; - In
Nextcloud-le-ssl.conf, setServerName your_domainandServerAlias www.your_domain; - In
Nextcloud.conf, setServerName your_domainandServerAlias www.your_domain;
- In
It may look something like this (/etc/apache2/sites-available/000-default.conf):
<VirtualHost *:80>
        ServerName your_domain

        ServerAdmin webmaster@localhost
        DocumentRoot /var/www/html

        ErrorLog ${APACHE_LOG_DIR}/error.log
        CustomLog ${APACHE_LOG_DIR}/access.log combined

</VirtualHost>
- Run
systemctl reload apache2andsystemctl restart apache2, once those configs are set; - Now, it is probably working, if not, try to reinstall the certbot by doing
certbot --apache; - If even with all these solutions your let's encrypt is not working, follow on with one of these alternatives, particularly this one:
"The default vhost is used whenever a client is accessing your server by direct IP-address(...)"