Migration to v3
Migration
Greenlight v3 is a completely new software application with an updated design and architecture. A migration system has been created to move resources from your Greenlight v2 instance to v3.
The migration system requires both Greenlight v2 and Greenlight v3 and to be deployed, running and accessible through a network.
The process intends to migrate the following resources:
- Users
- Roles & Role Permissions
- Rooms & Rooms Settings
- Shared Accesses
- Rooms Configuration
- Site Settings
How It Works
The migration system consists of multiples rake tasks and a restful API:
-
The rake tasks are to be executed from the Greenlight v2 deployment.
-
The rake tasks will send the data to the deployed Greenlight v3 server.
-
There are four rake tasks: roles, users, rooms and settings. Maintaining this order during the migration is necessary.
-
The migration endpoints are available as long as the Greenlight v3 server is running.
-
The restful API will receive and validate the migrated resources.
Prerequisites
Before the migration process, make sure that the Greenlight v3 server is running and accessible through your network.
Configuring the Environment
In Greenlight v2 .env file, add the following variables:
- V3_ENDPOINT, which points to your Greenlight v3 URL.
- V3_SECRET_KEY_BASE, a copy from Greenlight v3 SECRET_KEY_BASE. It is needed for the encryption process.

The rake migration task file
If your Greenlight v2 deployment is up to date with the official latest release, you can skip to Migration Steps.
Else, you will need to to load the rake migration task file into your directory.
To do so, follow the steps below:
-
Navigate to your Greenlight v2 directory
-
Download the migration rake tasks with the following command:
wget -P lib/tasks/migrations https://raw.githubusercontent.com/bigbluebutton/greenlight/v2/lib/tasks/migrations/migrations.rake
The file migrations.rake should now be present in your /lib/tasks/migrations directory.
To include our changes directly in the Docker container:
- Edit the volumes partition in the docker-compose.yaml to add the new migration file as follow:
services:
  app:
    volumes:
      - ./log:/usr/src/app/log
      - ./storage:/usr/src/app/storage
      - ./lib/tasks/migrations:/usr/src/app/lib/tasks/migrations
- Save the changes and restart Greenlight v2 by running:
sudo docker-compose down && sudo docker-compose up -d
Migration Steps
It is required to run the migrations in the following order: roles, users, rooms, settings.
The logs will indicate the status of the migrated resources in real-time, in the console.
Upon the successful migration of a resource, a green success message will be displayed in the console.
In case of an error, a red error message will be displayed in the console and should provide some details concerning the error.
However, a failed migration resource should not hinder the whole migration process - the process should not have failed for all the resources.
If you have an error, try re-running the migration task to resolve any failed resources migration.
If re-running the migration does not solve the issue, the error message should give you a clue of what went wrong.
Roles Migration
The custom Roles and the corresponding Role Permissions will be migrated.
Please note that:
- The default Roles (user, moderator, guest) will not be migrated as they are already present in Greenlight v3.
- The role color will not be migrated as this feature is not implemented in v3.
To migrate the Roles & the Role Permissions, run the following command:
sudo docker exec -it greenlight-v2 bundle exec rake migrations:roles
If you have an error, try re-running the migration task to resolve any failed resources migration. Also, make sure that the Greenlight v3 server is running and accessible through your network.
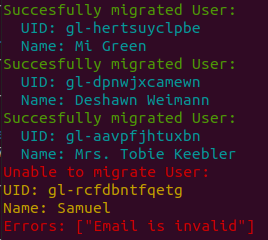
Users Migration
The Users will be migrated with their corresponding role.
Important notes:
- The accounts passwords can't be migrated from Greenlight v2. A rake task that sends an email to all the users and prompts them to reset their password is provided for Greenlight v3. When the migration is completed, please jump to After the Migration. Please note that if you are using external accounts, like Google or Microsoft, this is not applicable.- Pending, denied and deleted users will not be migrated to Greenlight v3.
- Both local and external users will be migrated.
To migrate all of your v2 users to v3, run the following command:
sudo docker exec -it greenlight-v2 bundle exec rake migrations:users
To migrate only a portion of the users starting from FIRST_USER_ID to LAST_USER_ID, run this command instead:
sudo docker exec -it greenlight-v2 bundle exec rake migrations:users\[<FIRST_USER_ID>,<LAST_USER_ID>]
Administrators can use the last command to migrate resources in parallel, the same migration task can be run in separate processes each migrating a portion of the resources class simultaneously.
If you have an error, try re-running the migration task to resolve any failed resources migration. Also, make sure that the Roles migration has been successful.
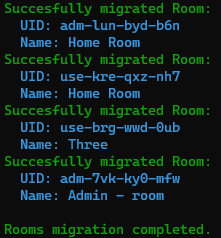
Rooms Migration
The Rooms will be migrated with their corresponding Room Settings. Also, the Shared Accesses will be migrated.
Important notes:
- Only the Rooms of the active users will be migrated
- The migrated rooms will be assigned to their respective migrated users on v3
- The presentations will not be migrated - the presentations will need to be re-uploaded to v3 by the room owner or shared access user.
To migrate the rooms, run the following command:
sudo docker exec -it greenlight-v2 bundle exec rake migrations:rooms
To migrate only a portion of users starting from FIRST_ROOM_ID to LAST_ROOM_ID, run this command instead:**
sudo docker exec -it greenlight-v2 bundle exec rake migrations:rooms\[<FIRST_ROOM_ID>,<LAST_ROOM_ID>]
Note: The partitioning is based on resources id value and not there position in the database, so calling rake migrations
Administrators can use the last command to migrate resources in parallel, the same migration task can be run in separate processes each migrating a portion of the resources class simultaneously.
If you have an error, try re-running the migration task to resolve any failed resources migration. Also, make sure that the Users migration has been successful.
Settings Migration
The Site Settings and the Rooms Configuration will be migrated.
-
The Site Settings are customisable settings related to the Greenlight application, such as the Brand colors, the Brand image, the Registration method, the Terms & Conditions.
-
The Rooms Configuration are the settings that are related to the default configuration of all the rooms, such as Allow Room to be Recorded, Allow any User to Start a Meeting, Access Codes.
Please note that:
- The Brand image will not be migrated - it will have to be re-uploaded to Greenlight v3 by the administrator.
- The administrator will need to reassign the Room Limit as a Role Permission (on a per role basis) instead of as a global Site Setting.
To migrate the settings, run the following command:
sudo docker exec -it greenlight-v2 bundle exec rake migrations:settings
If you have an error, try re-running the migration task to resolve any failed resources migration.
After the Migration
Having completed the migration successfully, it is now imperative to inform users of the need to reset their Greenlight account passwords. This can be achieved through the utilization of the rake task available in Greenlight v3. It is important to note, however, that this is not applicable for users who utilize external accounts such as Google or Microsoft.
To send a reset password email to all your users, run the following command:
sudo docker exec -it greenlight-v3 bundle exec rake migration:reset_password_email\[<BASE URL>]
The <BASE URL> in the command above should be replaced with your Greenlight domain name.
Also, please note that the BigBlueButton recordings list will now be empty.
To re-sync the list of recordings, run the following command:
sudo docker exec -it greenlight-v3 bundle exec rake server_recordings_sync